|
NAVIGATION
TOP of Page
MAIN Page
HOME Page
JEWEL BOX
About
Requirements
Variations
Processes
|
About Jewellery Boxes
 Jewellery Boxes in stages of production Jewellery Boxes in stages of production
Build a High Quality Jewel Box. I have made several Jewel boxes, a pencil box and even a bread box
to the same basic design. This is a product of your own hands and is eminently suitable as a birthday or a
Christmas gift. All have been well received. They cost only a few dollars each to make and take about four
hours to complete.
Requirements For Building
|
Timber Sides:
|
Five Ply veneer, 1cm thick, at least 10cm wide and 32cm long. Available from Bunnings.
|
|
Timber Lid:
|
Pine Board, 18mm thick, 300mm wide by 600mm long. Available from Bunnings.
|
|
Timber Floor:
|
Three Ply sheet, 3mm thick, at least 10cm wide and 20cm long. Available from Bunnings.
|
|
Veneer:
|
Beech 1220*385mm sheet. Available from Consolidated Edgings, Girraween, (02)9631-7722.
|
|
Handles:
|
Available from the Cupboard Components section of Bunnings.
|
|
Lining:
|
Adhesive backed Rubber Sheet, 300mm sq, used for lining kitchen cupboards. Available from Bunnings.
|
|
Stain:
|
Feast Watson/Intergrain, Mahogany or Walnut. Available from Bunnings.
|
|
Plastic Feet:
|
Packet of 12. 1cm diam, 5mm high. Available from Woolworths Hardware Shelf.
|
|
Glue:
|
PVA Glue - Aquadhere. Available from Woolworths/Bunnings/Masters.
|
|
Steel Wool:
|
For smoothing the veneer.
|
|
Iron:
|
Domestic, for ironing on the veneer.
|
|
Knife:
|
Circular Blade for trimming the veneer.
|
|
Hammer:
|
Claw Hammer plus 50 of 25mm long 2mm nails.
|
|
Nail Punch:
|
For sinking the nails below timber level.
|
|
Circular Saw:
|
Mounted in Saw Table, 1000W set up for ripping.
|
|
Router:
|
Mounted in Router Table, 1000W with basic Router Bit kit.
|
|
Sander:
|
Handheld Mouse type for sanding the wood panels and the veneer.
|
If the power tools are a little beyond your reach, I would contact a local woodworking club.
For a small fee you would be able to get the timber cut and routed. A small amount of hand
sanding would then be required. It also helps to get on with the neighbours as there is
usually a woodworker in every street. Just listen for the circular saw at work on the weekends.
TOP
MAIN
HOME
Variations On A Theme
|

|
|
Utility Box
|
Bread Basket
|
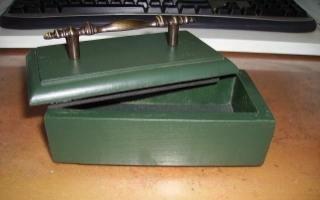
These two projects were my first and last versions of the Jewel Box. The first was an experiment with offcuts
to produce a small box to hold the screws, nuts and bolts I recover when disassembling anything for repair. The
second turned out to be a well deserved method of keeping my bread viable for a week. The Breadbox just fits a
standard loaf and the inside is unstained and lined. It kept bread fresh for about a week and a half in winter.
TOP
MAIN
HOME
Processes For The Work
|
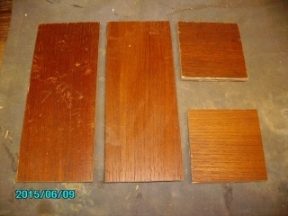
Timber cut to size using Circular Saw
I use my Triton Workbench with an attached Circular Saw, an inheritance from Dad. The timber is first trimmed
to 10cm width along the grain. This piece is then crosscut into two lengths of 20.0cm and two lengths of 9.0cm.
The longer two will become the sides, the shorter two will become the ends.
Note: If you do not own a Saw Bench, try a Manual Saw with a decent blade by cutting slightly under-size then
use a plane to get the correct dimensions. Then use a Mitre Box to achieve the cross cuts.
At worst, talk to you friendly neighbourhood wood enthusiast, who will usually be only too happy to assist.
|
|
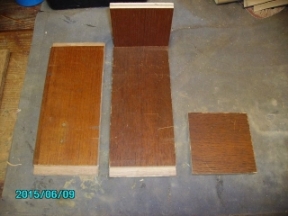
Rebating the edges of the longer sides
I use a cheap 850W Aldi Router mounted in an Aldi Router Table using a Straight Cut Router Bit to achieve the
rebate on the ends of the longer pieces. The rebate width thickness of the timber (=1.0cm) and the depth of the
rebate should be half the thickness of the timber (=0.5cm). It is best to attack the routing in several runs of
increasing depth. This gives less wear on the routing bit and less load on the router.
In days of yore a saw was used to cut the edge of the rebate and then a broad bladed chisel then used to cut out
the timber.
|
|
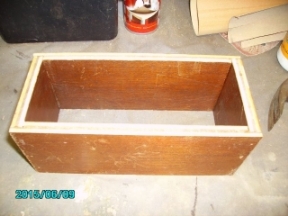
The sides of the box are attached
Glue and nail the sides of the box into the rebates on the end sections. You should end up with a box with
square corners. If not, slight adjustment with a lightly applied hammer is warranted. Be sure to countersink
the holes so they do not interfere with the sanding.
|
TOP
MAIN
HOME

|
The surfaces of the box are sanded
I use a cheap Ozito handheld 'Mouse' type finishing Sander with 200 to 400 grade Sanding Papers. Use delicate
application to remove the old varnish and defects in the old timber. Sand the ends so that the veneers of the
side sections align with the end sections. Be careful not to curve the corners, which will make veneering
difficult.
|
|
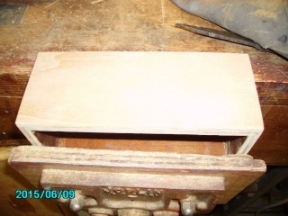
The sides of the box are veneered
Occasionally I run into a bit of luck when I discover the veneer used in the box sides is of acceptable finish,
so that it does not require veneering. Most times I cut the veneer to about 1cm larger than required on each
side and iron on the sheet, applying firm pressure with the iron. Don't be amazed if the veneer creeps - merely
reheat the veneer and slid it back into position.
|

|
The veneer is trimmed
Use a circular bladed knife, a Stanley knife or a sharp thin bladed chisel to trim the veneer as close to the
body as possible.
|
TOP
MAIN
HOME

|
The top of the box is veneered
Cut small strips of veneer and edge them at 45 degrees to fit the top edges of the sides and ends. Again use an
iron to apply heat and pressure to adhere the veneer. This is done to make a flat reliable surface for the lid
and to hide the end veneer on the sides.
|

|
The bottom of the box is attached
Cut a section of thin three ply into a 20cm by 10cm area to fit the bottom. Glue and nail it to the bottom of the
sides. Trim it with the sander and sand the bottom down to be able to apply staining. |
|
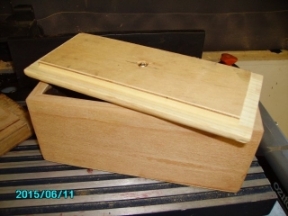
Building the Lid:
Using a 20cm by 10cm block of 18mm thick Pine Board, rebate a cut 10.5mm wide by 5mm deep all around the bottom
using a Router with a Straight Cut Router Bit. Again, several runs at accumulating depths are advisable. Using a
12.5mm Radius Curved Router Bit, cut a curved edge around the top of the block. Leave a couple of small flanges at
the top and the edge for an artistic effect. Refer the next image for a view of the result.
|
TOP
MAIN
HOME

|
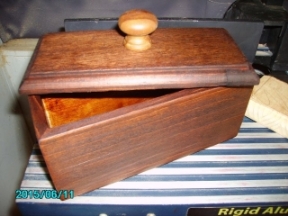
The handle is attached
Mark the centre of the block and countersink a 12mm hole to a depth of 5mm. This will put the head of the screw
below the surface of the inner lid. Drill a 3mm diameter hole to accept the mounting screw for the handle. Trim the
mounting screw to an appropriate length using a pair of pliers and a small file to flatten the end of the thread.
Mount the handle using an washer on the inside and the decorative flange (if supplied) on the outside. .
|
|
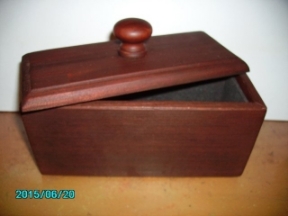
The veneer is stained
Slightly dampen the surfaces and rub down with Steel Wool. This makes the wood fibres protrude from the surface and
then be ground down for a beautiful finish. Stain all surfaces with an oil or water based stain. I would recommend
a dark colour such as Mahogany or Walnut to give an antique look to the box. The best way to stain is using rubber
gloves and scrap cloth to rub the stain into the timber. Several applications may be required. It is one of the most
satisfying things you can do with timber and may lead you astray to later furniture restoration.
|
|
The interior of the box is lined
Cut the Rubber Sheet to 9.0mm width for the sides and ends. This enables the flange on the lid to sit in without hitting
the lining. Cut the strip into appropriate length pieces and apply them to the walls. When cutting consider the space
available with the previously applied piece - this seems to get me into trouble every time. Cut and apply an appropriately
sized piece for the floor and another for the underside of the lid. Glue four of the small plastic feet at 1cm in from the
corners of the bottom to prevent scratching of the dresser surface.
|
TOP
MAIN
HOME
|
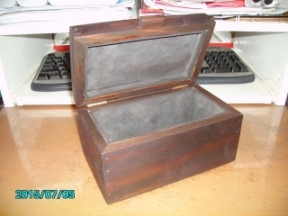
A special hinged box
A work friend had been following my previous displays of workmanship of Facebook, and had suggested doing a hinged version.
It took a lot of work to achive a flat match between the lid and the box, but the result was worth it. The only extras
required were two small brass hinges and a handle made from a small section of timber. She received it as a birthday present
to great appreciation.
|
TOP
MAIN
HOME
|


